Resources:
How to Spiff Up Your Hand Lettering in Photoshop
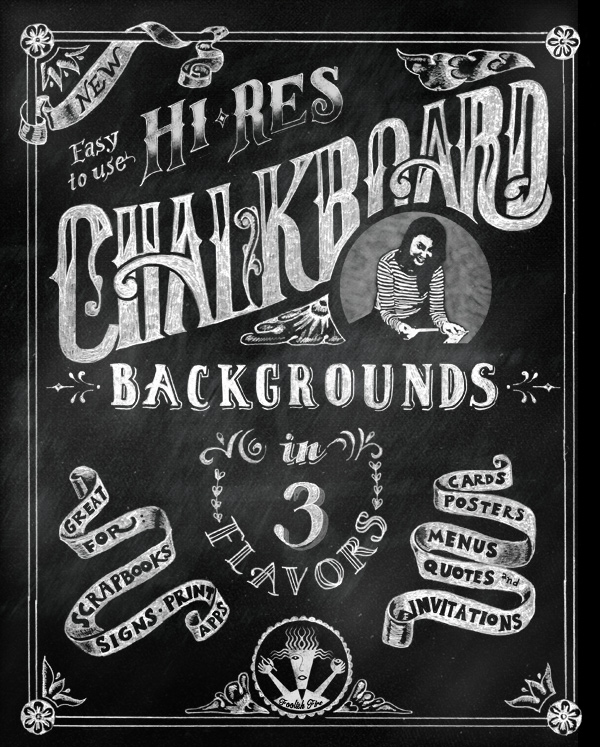
Free Downloadable Chalkboard Backgrounds
Hey look…a new Foolish file!
Hi-Res Chalkboard backgrounds in 3 flavors!
By popular demand we’ve added a set of high-res backgrounds for just a buck ninety-nine. These will work a lot better for anything you intend to print at 8.5×11 and smaller.
The Tutorial
Every once in a while it’s fun to go off the reservation and display your work with a different look and feel. I’m partial to the nostalgic chalkboard effect but that could also be because I’m old enough to remember actual chalkboards. There I said it. The good news is it’s not brain surgery as long as you have a scanner and a copy of Photoshop.
TIP: To really get that “chalky” effect, I do my original lettering in pencil as opposed to ink.
- Save some time and grief by either downloading the free chalkboard background file in the previous post or obtain one of seventeen gagillion stock photos of a chalkboard from iStockphoto.com, 123RF.com or the stock photo source of your choice. If you do download a stock image, make sure it’s at least 600px wide so you’re not upsizing it to make your final post file.
- Create a New file in Photoshop at 612px by 792px (8.5×11 aspect ratio). Set the resolution at 72 dpi, use Grayscale format. Save as a .psd file. I like to name these files something like “chalkboard-base.psd” as I can generate several pieces from this one layered file.
NOTE: Starting with a 72 dpi file just gives you a more manageable file for posting your artwork quickly, but the final product will look pretty bad if you try to print it. If one of your goals is to print your work, start with a .psd file at 300 dpi, and set your scanner to scan at 300 dpi as well.
- Open your chalkboard background stock file, Select All, copy the image.
- Paste the stock photo onto the chalkboard-base file. Size to fit using Free Transform (Command-T). Try to avoid upsizing, only downsize if necessary. Name the new layer “chalkboard”.
- Scan your lettering artwork using a flatbed scanner set at 150dpi, (300 dpi if you intend to print the final product) black and white mode, no image correction and use .jpg file format.
- Open your scanned artwork file. You should now have your chalkboard-base file open along with your artwork file. On the artwork file, open the Levels menu (Image > Adjustments > Levels) and adjust the contrast if needed. The Auto Levels button in the dialog box can sometimes do the trick, but make sure you don’t exaggerate the contrast so much it obscures your beautiful, spontaneous line work. You want detail in the darkest and lightest parts of the image.
- Clean up smudges and “oogies” (trademarked…thank you) with a cloning tool, brush or healing brush. Need help? See A Beginner’s Guide to Spiffing Up Your Hand Lettering in Photoshop
- Use the marquee tool to crop around the work if necessary. Copy the selection.
- Open your base file and paste the artwork file. You’ll notice a new layer has just been created. Save As your file as a .psd (layered Photoshop) file.
- In your new chalkboard-base.psd file Select the artwork layer and invert the colors by either using Command-I or going to Image > Adjustments > Invert. Your file will now be reversed but you notice a distinct, rectangular border where you made the marquee selection, so with the layer selected change the Blending Mode to Screen. It should look like your work has just plopped itself right on top of a chalkboard.
- TIP: If your chalkboard background layer is too “busy” i.e. to many white, distinct scratch marks, they may show through the lettering. To remedy that, try blurring the base file a bit. Go to Filter > Blur > Motion Blur and adjust the angle and distance settings until the artwork and base merge convincingly.
- When everything looks exactly like you wrote it by hand in a classroom in 1965, go to File > Save for Web & Devices and save your .jpg for posting.TIP:If you’ve created your piece at 300 dpi, you may want to “Save As” a 72 dpi version first to expedite the optimizing process.
Perfect–thank you! (except that in 1965 it would have been a green chalkboard, not a black one! Voice of experience talking)
Very nice tut, thanks so much! This should work in PSE too right? 🙂 /Maree
Thank you. I haven’t tested it but I believe it will work fine in Elements.
You’re right! I stand corrected. 🙂
This is such a great tutorial – thanks so much. I can’t wait to try it.
Pingback: How to fake a chalkboard effect in Photoshop | foolish fire « tbg design – everything
Thanks for the kind comment. I’m also intrigued by the combination of digital and real-world techniques and plan to keep exploring that realm.
Love it! I’ll definitely have to to try this out soon 🙂
great tutorial … but there is no reason to work with a file less than 300dpi if you can help it…. advising 72dpi will make the file impossible to print w/o pixelation.
Hmmm…I made that caviat within the tutorial for cleaning up hand lettering artwork, but did in fact neglect to include in this one. You’re right to point that out, so thanks! These “chalkboard” tutorials are directed toward an audience who is primarily interested in scanning and posting their work on a community Pinterest board, thus hauling round large files might be an issue for some users prior to optimizing. I’ll make that addition, though.
that’s really pretty!
Thank you.
Great tutorial AND free downloads! Fabulous.
Thank you!
Thank you!
My pleasure.
You still have to have the talent to hand draw the designs. Just about anyone that has that ability already knows how to add contrast and invert an image in photoshop to get it to look like chalk. Nothing new here.
Absolutely right. This isn’t at all geared toward professionals, as you appear to be, but simply a couple of curious hand letterers on a Pinterest board, who saw the chalkboard effect and wondered how I did it. Only trying to help those who are new to Photoshop, not boldly go where no one’s gone before. 🙂
This is just what i was looking for. Thanks
Pingback: It’s Never Too Early For Christmas Cards « Birdwing Paper Designs
Pingback: Photoshop Chalkboard Effect | Kaitlyn Faller
CJ great comment, way to point out the obvious for skilled artists and Photoshop workers. Glad you got your comment in. Not every tutorial is designed for you, sorry James forgot that he needed to post his tutorial for an audience of you.
James every little tip or idea for things that look cool is helpful to me. I appreciate the tutorial.
Pingback: Chalkboard Writing |
I really enjoyed this post (and think CJ makes himself sound like a pompous jerk) I am not the best at hand drawing wording – and am just learning to use the several PS programs I have – Thanks for being one of those people willing to share step by step lessons to help others learn and grow… is there by chance some other way to manage the wording without have to create it by hand?
Pingback: ???Photoshop??????????????????25???? 2012?10?? - Photoshop VIP
James, you are so nice about posting responses to comments/corrections! Nice, helpful tutorial. And thanks for making the internet a more cordial place!
We do what we can. Thanks for the kind words.
Since I was not born knowing all of the nuances and tricks to PhotoShop, I very much appreciate tutorials like this one. Thank you for taking a charming effect and making it simple enough for any level user of PS to create.
(CJ, did you know that many artists draw, paint, sculpt and so forth without a single class in Photoshop? Tis true and I will vouch for that.)
Quick question: did you base your work on any existing fonts?
Great question. The answer is yes and no. Depends on the project. I would say everything is “based” on existing letterforms, but I mostly take liberties in my hand lettering. Sometimes new letterforms will emerge from experimentation with traditional fonts. I’m grateful that my graphic design and calligraphy training has given me enough grounding in typography to be able to break the rules on occasion. If you’re asking if the work is traced from existing fonts, then no, it’s all created with pencil or pen on paper originally, then scanned. Sometime’s I’ll use a straight edge to make guidelines, but mostly I use the level in my head. Thanks for asking.
Pingback: Printable Friday: When you stop believing in Santa Claus you get underwear | Pretty Envy
Great tutorial- Thanks! I loved the tip on drawing it in pencil, and also inverting it with a screen blending mode. I typically just make photoshop brushes with my drawings and then apply them in the desired color/ opacity. This was a fun alternative and I’ve been drawing in”faux chalk” all day.
Pingback: First Birthday Invitation | breannadesigns
CJ Isn’t there always one that has to point out how “knowledgeable” they are. Wow, CJ! You really rock… at being a total JERK! That is for your moment of fame!
I APPRECIATE the tutorial and wish more people were as open to share their knowledge.
Pingback: Kitten Lane Chalkboard fonts, tutorials and freebies
Pingback: Segnatavolo per matrimoni
Thank you, James. This is fantastic and exactly what I was looking for. I’m curious: what are your thoughts on creating this effect using a digital pen tablet?
Doable? Or do you think it’s best with pencil only?
Thanks!
I think this effect is definitely doable using a tablet. You’ll just need to experiment with brushes and settings that produce a chalky texture when reversed. I prefer an old school #2 pencil and real paper for the main artwork because it gives me more fine control but I do use my Wacom for my clean up stages. If you try it, please let me know how it works for you.
Pingback: Covertrend: creatief met krijt | Bladendokter
One detail to pay attention to is to create your hand lettering using a standard number 2 pencil. You want the pencil texture even when filling in of areas and larger letters, rather than inking it. The pencil will convincingly look like chalk when inverted. You can try experimenting with rougher papers and/or softer pencils.
Sage advice. Definitely pencil over ink to emulate chalk, although I would tend to agree about the #2 pencils. I tried a vast array of drawing pencils of various hardnesses when I started doing this and ended up liking the cheapest, most standard pencil I had on the office supply shelf.
Dear CJ what a curious comment. I know many hands skilled in the art and craft of drawing and 90 % of those people wouldn’t even know how to open a PS document let alone make a chalkboard work of art. Does anyone else taste lemons!? I loved this tutorial. Thanks James.
I for one, agree with CJ. He could have left off that last sentence however. This is a great tutorial for those gifted/trained in the skill of hand drawing, but those of us who have a reasonable working knowledge of Photoshop, but no hand drawing skills, were disappointed to find that this was not a tutorial on “how to fake a chalkboard effect in Photoshop”. It was however, a very nice tutorial on “how to turn hand drawn lettering into chalk lettering using Photoshop”.
You’re absolutely right in that the tutorial was originally targeting folks in a Pinterest group whose common interest was hand lettering. The pin ended up being so unintentionally popular that a whole, new and more diverse audience is now looking at it, including folks like you for whom hand lettering isn’t an option. So…I’m in the process of developing another tutorial which provides a way to use machine text in much the same way—still with the goal of emulating a chalkboard but without requiring the hand work. I’ll keep your email handy when it’s posted or you can subscribe and I can let you know that way, if you’re interested.
Pingback: Duke vs. UNC « It's Synthia… with an "s".
Pingback: Chalk Talk » Graphic Sugar Blog Site
Pingback: a new focus: creativity | twelvex30
Pingback: Fridays are for Favorites | from house parties to housewife
Pingback: Chalkboard Effect in Photoshop | joachimott | journal
Hello! I was so excited to find this tutorial. I am not very Photoshop savvy and was sure I would be confused, but I followed your instructions and had no problems: until the end. I got stuck on the marquee tool part. Here’s my problem: I can select the section I need and either cut or copy it just fine. But I can’t select it in order to copy it. I was, however, able to drag it onto my chalkboard-base. However, when I do that, it’s super huge! Both my chalkboard-base file and my scanned artwork files are 8.5×11, so I don’t get why when I drag the artwork onto the chalkboard it’s so big! I can’t see how to make it smaller. I did invert it and change the blending mode to screen, and it looks so perfect I can’t believe it! The only problem is it being too big. If you can understand what the heck I mean and know how to fix it, I would be much obliged!! Thanks again for the great tutorial!
It’s not a problem if the scanned artwork is a lot bigger than the chalkboard base. Just use the Transform tool (Edit > Transform) to select the artwork, grab the handles and downsize it to fit the onto the base. Alternatively, make sure you scan your artwork at the same resolution as the base file. Then, provided they’re both 8.5×11, they should be the same size. Hope that helps.
Pingback: Chalkboard Graphic | JamiBrames.com
Love it! Thanks for the inspiration!
is there a way to get ONLY the letters onto the chalkboard background without having to go back and pretty much erase all around them? VERY helpful tutorial, by the way! =]
Pingback: Chalkboard Style « Still Waters Art
Jess – that is what choosing “screen” from the layers palette does for you.
I paid on paypal but where do I down load the chalkboard file
Pingback: DIY Chalkboard Projects - Bajan Wed
This is a fun tutorial! useful and fairly easy to understand. Thanks for the inspiration and tips!
Thanks, Sydney. Please feel free to ask specific questions if you have them.
Pingback: Five Nifty Things #3 | 100 Baby Sweater Patterns
Thank you kindly for the tutorial and free background!
Pingback: Guest Bedroom Makeover REVEAL | TIDBITS&TWINE
If i resume :
– Draw in black with pencil
– scan and Invert on photo
Tadaaaaa !
Yeargh, fast and clean;)
How do I attempt this in PSE?
A better way to approach it might be to attempt the tutorial and tell me if/where you get stuck. As far as I know, you should have the necessary resources available in Elements.
I’ve been looking around at all of the chalkboard fonts and backgrounds that are available. Am I correct in that when you use these fonts on a chalkboard background, it will then print filling in the whole background in black? If so, doesn’t that take up tons of ink? Isn’t there a way to print white letters on a piece of black card stock?
I feel your pain about the ink usage when printing chalkboard projects with CMYK printers. I’ve heard rumors that replacing the black ink cartridge in your printer with white ink might work but I’ve never tried it myself and where you’d even find white ink for an inkjet printer is anybody’s guess. Laser printers might work better but frankly I’d predict you’d get disappointing results either way, likely having to print the same piece several times to get adequate coverage. For multiple copies, commercial print vendors might be the answer. Good luck!
Love the tutorials and examples. Thank you. I’m practicing on my son’s irst birthday party invites w some space themes and lettering on a chalkboard background and wondering if I need to make any special considerations for printing since it’s effectively white on black (or a lack of ink surrounded by black ink)…? CMYK seems to produce the best chalk like images over RGB, but I was going to send them to be printed at mpix who uses RGB for some reason. I don’t understand why. Any suggestions for other print vendors for this medium or ways to ensure my designs don’t get eaten up by black ink? :-/ Thanks for the help. d-m
which fonts you use?
I don’t use fonts on any of the chalkboard work. It’s all hand lettering. That said, there are lots of “chalkboard” fonts both free and for purchase (the latter are usually higher quality). The sources are too numerous to mention but I’d start by searching Pinterest.
Pingback: Oh How Pinteresting | A WordPress Site
Pingback: Fridays are for Favorites | from house parties to housewife
Pingback: Made With Love for Mother’s Day | Hallie Faulkenberry
Pingback: Chalkboard Wine Labels - 2paws Designs
Pingback: A Chalkboard Effect To Say Thanks... - Now And Again Paper
Pingback: How To Make Fake Documents With Photoshop | All Documents
Pingback: How To Fake Documents With Photoshop | All Documents
Genius!! Thank you so much for sharing and lending your insight!
Very nice tutorial, thank you!
Jana
http://www.ubrisoft.com
Rather than scanning your own had lettering can you simply add text with chalk board fonts? Do you have any advice on that? Also sending the file to a commercial printer would yield the best results?
Thank you for the great tutorial!!
The lettering is amazing. I love the word “Chalkboard” on our poster. You should sell that font because I want to buy it.
Thanks for the tutorial.
Thanks for the kind words. Unfortunately, noine of the lettering you see on the sample chalkboard is comprised of fonts. It’s all just pencil converted to ink converted to scans, and layered over the background digitally.