In past chalkboard-related posts I’ve put it out there that I’d love to see what chalkboard background buyers/downloaders are making with these files. On occasion I hear back…
So thanks, Marilyn Curtright. Great job, and I’m glad the backgrounds came in handy. With the popularity of chalkboards still on the rise there are more and more free fonts and resources for chalkboard artists who want to create a chalkboard effect without inhaling dust or even adding hand-lettered and scanned text.
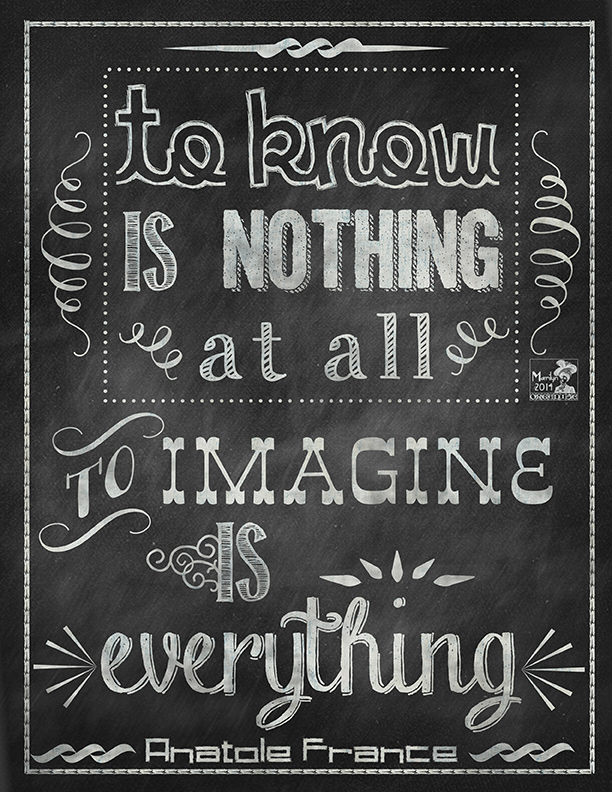
Marilyn describes in meticulous detail how she created the poster below In Photoshop, even down to the fonts and hex colors.
Thought I’d let Marilyn describes the process in her own words:
“Hi James,
I belong to the Art Journal Caravan for 2014, a year-long “workshop” held by Tangie Baxter over at ScrapbookGraphics.com. For week 10, back in March, one of the prompts suggested to make a layout using a chalkboard effect. So with your chalkboard background as a base, some nice chalk fonts and dingbats, and a great quote, I put together my piece.
Chalkboard background from foolishfire.com, fonts include Bergamot Ornaments – dingbats, Kraft Nine, Handy George, Return to Sender, Chalk-hand-lettering, Clementine Sketch, Square Chalk, DeLouisvilleSmallCaps
Font color: #d1d5d3 (lightish gray). I didn’t want it to be stark white.
For each text layer, I added a pattern overlay to my text, just something that looked a bit like crumpled paper. This was set to NORMAL at about 50% opacity to give the wording some texture.
When I was done with my design, I created a composite of all my layers. At the top of the layer stack, Ctrl-Alt-Shift-E.
On the composite, I created a layer mask, with low opacity, used the same font color as above and with random brushes, I lightly brushed over all creating the smudged chalky effect.
I did use as a resource a tutorial by Courtney Odell, found on the web.
Hope this helps.
Marilyn